


In this article, I will be showing how I build Arduino based obstacle-avoiding robot car. The car uses a mounted ultrasonic sensor to detect objects in front of the car and an L293D motor driver shield to drive two-wheel geared motors, one on each wheel. An Arduino Uno underneath the motor driver controls the motor shield and ultrasonic sensor.
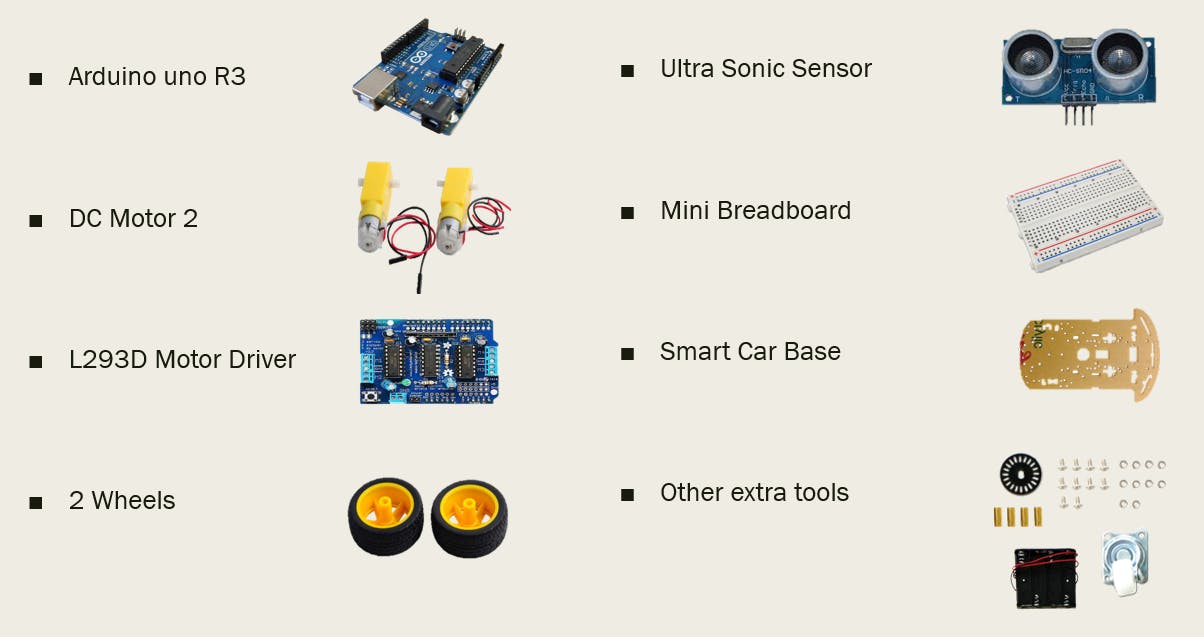
Here's What You Need To Build An Obstacle Avoiding Car
How To Assemble Your Robot Car
Let's have a look at the motor driver shield before we start developing the real obstacle-avoiding car. The motors are controlled by an L293D motor driver shield, which consists of two L293D driver chips and a shift register.
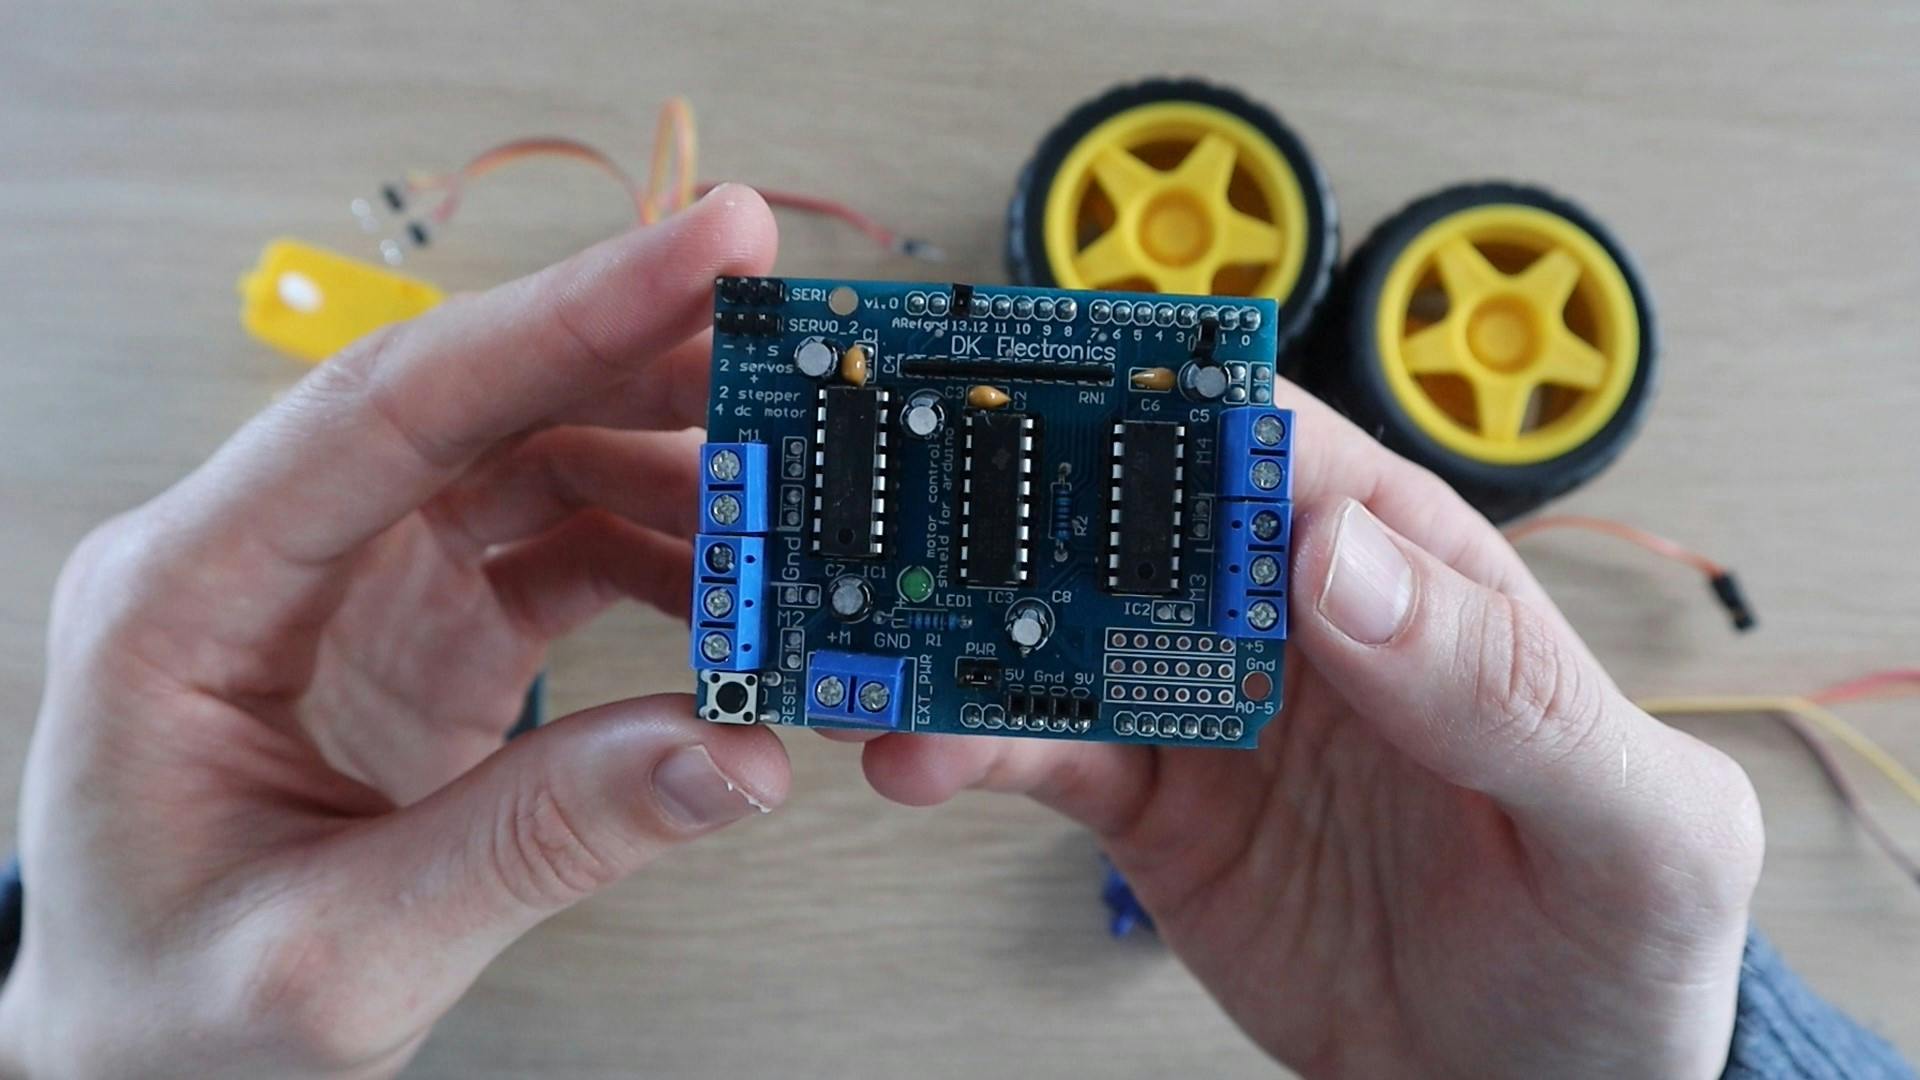
An ultrasonic sensor employs ultrasonic sound waves t estimate the distance to an item by measuring how long it takes the pulse to bounce off the object and return to the sensor. Each of the two wheels on the obstacle-avoiding car is powered by a geared DC motor and you need to connect a short power line to each, along with some pins to screw into the shield terminals.
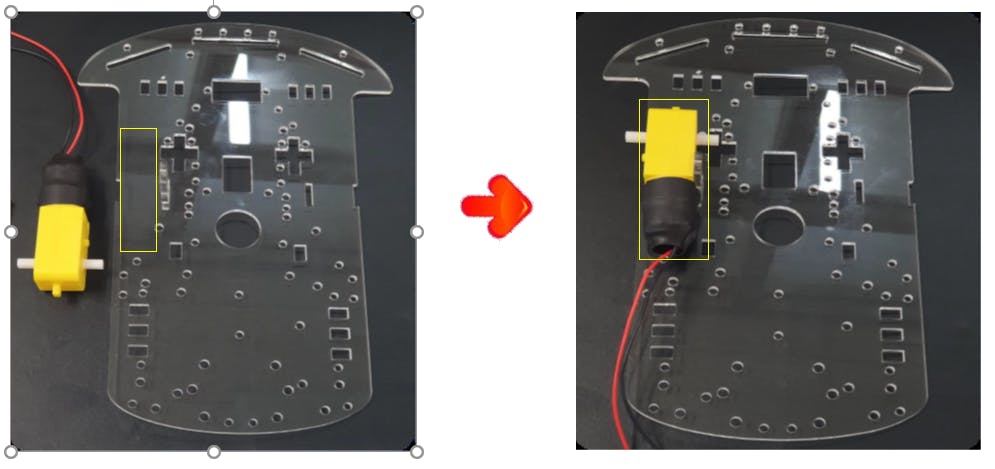
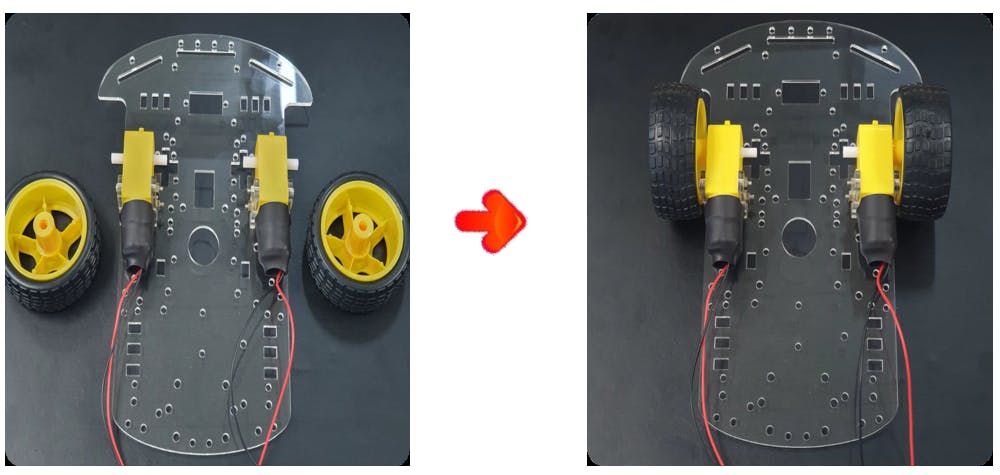
Now I will show you how I assemble the robot car step by step. Firstly, you need to attach two DC motors to the car base as shown in the picture.
 Then connect two wheels to the motors and bolts as shown in the photo
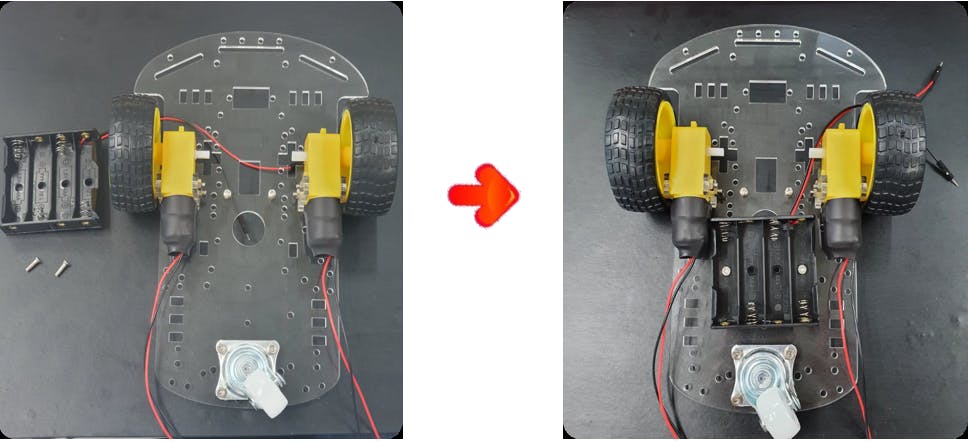
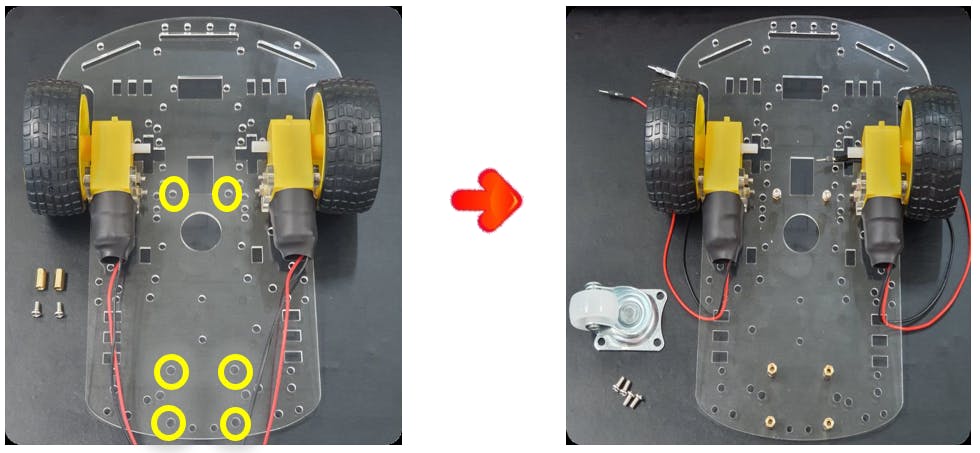 And then attach the auxiliary wheel and battery holder to those bolts.
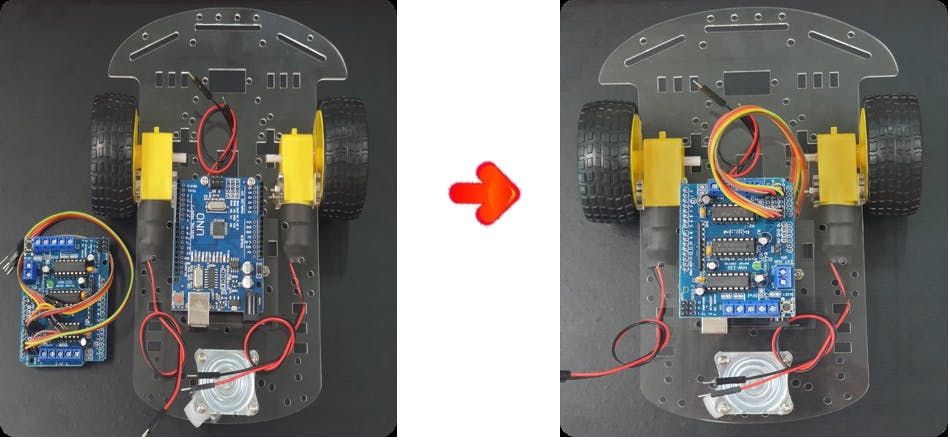
 Connect L293D motor driver to Arduino uno and then attach to the car base.
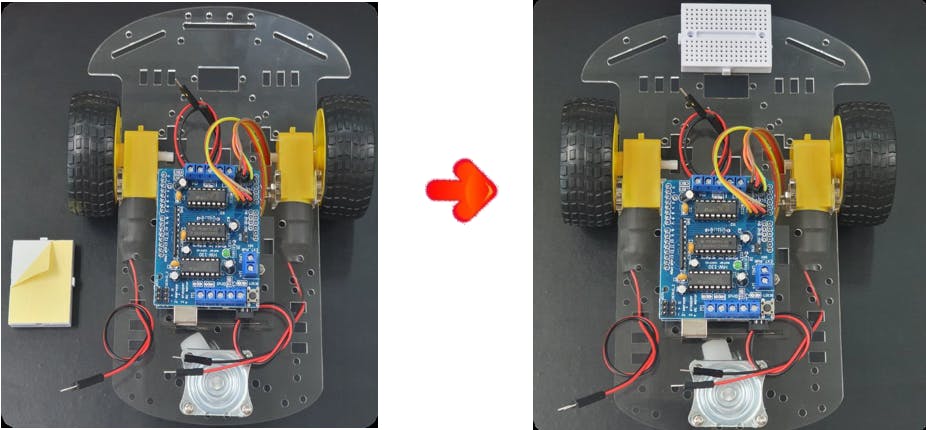
 The final step is to stick the mini breadboard to the car base.
Programming The Arduino
This is the code for the obstacle-avoiding robot car. To use code properly, be careful with pin connection and watch what pin is responsible for proper position.
#include <SoftwareSerial.h>
#include <AFMotor.h>
AF_DCMotor motor_L(1);
AF_DCMotor motor_R(4);

int Lspeed = 170;
int Rspeed = 200;
int TrigPin = A0;
int EchoPin = A1;
long duration, distance;

void Obstacle_Check();
void Distance_Measurement();
void Forward();
void Backward();
void Right();
void Left();
void Stop();

void setup() {
  Serial.begin(9600);
  Serial.println("Eduino Smart Car Start!");

  pinMode(EchoPin, INPUT);
  pinMode(TrigPin, OUTPUT);

  motor_L.setSpeed(Lspeed);
  motor_L.run(RELEASE);
  motor_R.setSpeed(Rspeed);
  motor_R.run(RELEASE);
}

void loop() {
  Forward();
  delay(50);
  Obstacle_Check();
}


void Obstacle_Check() {
  int val = random(2);
  Distance_Measurement();
  delay(50);

  Serial.println(distance);

  while (distance < 300) {
    if (distance < 150) {
      Backward();
      delay(800);
      Stop();
      delay(50);
      Distance_Measurement();
      delay(100);
    }
    else {
      if (val == 0) {
        Right();
        delay(400);
      }
      else if (val == 1) {
        Left();
        delay(400);
      }
      Distance_Measurement();
      delay(100);
    }
  }
}

void Distance_Measurement() {
  digitalWrite(TrigPin, LOW);
  delay(2);
  digitalWrite(TrigPin, HIGH);
  delayMicroseconds(10);
  digitalWrite(TrigPin, LOW);
  duration = pulseIn(EchoPin, HIGH);
  distance = ((float)(340 * duration) / 1000) / 2;
  delay(50);
}

void Forward() {
  motor_L.run(FORWARD);  motor_R.run(FORWARD);
  motor_L.setSpeed(Lspeed);  motor_R.setSpeed(Rspeed);
}

void Backward() {
  motor_L.run(BACKWARD);  motor_R.run(BACKWARD);
  motor_L.setSpeed(Lspeed);  motor_R.setSpeed(Rspeed);
}

void Right() {
  motor_L.run(FORWARD);  motor_R.run(BACKWARD);
  motor_L.setSpeed(Lspeed);  motor_R.setSpeed(Rspeed*0.5);
}

void Left() {
  motor_L.run(BACKWARD);  motor_R.run(FORWARD);
  motor_L.setSpeed(Lspeed*0.5);  motor_R.setSpeed(Rspeed);
}

void Stop() {
  motor_L.run(RELEASE);       motor_R.run(RELEASE);
  motor_L.setSpeed(0);  motor_R.setSpeed(0);
}